เพื่อโปรโมต Set For Life ให้ดียิ่งขึ้น Allwyn ได้ร่วมมือกับโปรดิวเซอร์และนักเล่นดนตรีที่ได้รับรางวัล เฟรเซอร์ ที สมิธ.แคมเปญใหม่ที่ทำขึ้นโดย VCCP London และ Hearts & Science มุ่งเน้นไปที่ความสามารถในการทำซ้ำของการชนะ Set For Life
Set For Life สำหรับการอ้างอิงเป็นเกมตามการจับรางวัลที่จัดขึ้นทุกวันจันทร์และพฤหัสบดีตามชื่อของเกมดังกล่าว มันให้ผู้เล่นได้รับรางวัลสูงสุด 10,000 ปอนด์ต่อเดือนเป็นเวลา 30 ปี ทำให้พวกเขาไปชั่วชีวิต
แคมเปญหลายแพลตฟอร์มใหม่นี้เป็นไปตามแคมเปญของ Allwyn สำหรับเกม Lotto เรือธงและได้รับการออกแบบมาเพื่อสร้างความบันเทิงให้กับผู้ชมทั่วโซเชียลมีเดียทีวีและโรงภาพยนตร์แคมเปญนี้มีแทร็กใหม่ล่าสุดที่เรียกว่า “Win on Repeat”ประพันธ์โดย Fraser ชิ้นนี้ถูกทอตลอดแคมเปญแบบบูรณาการในทางกลับกัน VCCP ได้สร้างโลกแบรนด์ที่โดดเด่นสำหรับ Set For Life โดยทำให้มันแตกแตกต่างจากแคมเปญโฆษณาหวยแห่งชาติอื่นๆ
แคมเปญใหม่นี้จะได้รับการส่งเสริมทั่วสหราชอาณาจักรและรวมถึงการแสดง OOH ที่มีผลกระทบสูงที่ Outernet ของลอนดอนและไซต์ OOH ที่โดดเด่นทั่วสหราชอาณาจักรเป้าหมายคือการดึงดูดผู้เล่นใหม่และนำพวกเขาไปสู่ The National Lottery.
ด้วยรางวัลสูงสุดที่โดดเด่นของ Set For Life มูลค่า 10,000 ปอนด์ต่อเดือนเป็นเวลา 30 ปี พวกเราจึงมีช่วงเวลาที่ยอดเยี่ยมในการฝันถึงการอัพเกรดชีวิตแบบดีลักซ์ทั้งหมดที่สามารถนำเสนอ — ทั้งหมดนี้กับจังหวะอันแสนวิเศษของแทร็กที่ออกแบบมาอย่างสวยงามของ Fraser
สตีฟ พาร์กินสัน ผู้อำนวยการฝ่ายตลาด Allwyn
เฟรเซอร์ ที สมิธ ยังแสดงความคิดเห็นเกี่ยวกับเรื่องนี้โดยกล่าวว่าแนวคิดแคมเปญของ Allwyn ดึงดูดเขาทันทีเขาพูดว่าเขารู้สึกเป็นเกียรติที่สามารถทำงานกับ The National Lottery ได้
การทำงานกับ The National Lottery ซึ่งสร้างเงินทุนจำนวนมากสำหรับโครงการ รวมทั้งความคิดริเริ่มจากดนตรีทั่วสหราชอาณาจักร รู้สึกพึงพอใจมาก
เฟรเซอร์ ที สมิธ
Darren Bailes ประธานเจ้าหน้าที่การค้าทั้งโลกของ VCCP Group กล่าวเสริมว่าทีมของเขาทำทุกอย่างในอำนาจเพื่อสร้างแคมเปญที่จะตอบสนองกับผู้ชมใหม่Simon Carr หัวหน้าเจ้าหน้าที่กลยุทธ์ของ Hearts & Science UK กล่าวเสริมว่าแคมเปญ Set For Life ใหม่แน่นอนว่า “ดึงดูดความสนใจของผู้ที่ฝันถึงอนาคต”
แคมเปญ Set For Life ใหม่จะเริ่มถ่ายทอดสด 31 มีนาคม.
ในระหว่างนี้ CAMH กล่าวเสริมว่าการโฆษณาไม่ควรกระตุ้นให้ผู้ที่ไม่ใช่พนันเล่นและขัดขวางการแพร่กระจายของโฆษณาการพนันในกีฬาสิ่งนี้สะท้อนคำร้องขอล่าสุดของ Ban Ads for Gambling เพื่อลดการโฆษณาการพนัน
บรูซ คิดด์ซึ่งเป็นศาสตราจารย์กิตติมศักดิ์ด้านกีฬาและนโยบายสาธารณะที่มหาวิทยาลัยโตรอนโต และผู้ก่อตั้ง Ban Ads for Gambling กล่าวถึงโฆษณาการเดิมพันกีฬาว่าเป็นสิ่งที่ทำให้ผู้คนเชื่อมโยงการพนันกับกีฬา และส่งเสริมแนวคิดว่าการเดิมพันเป็นข้อสำคัญของภาคส่วน
American Gaming Association เพิ่งเปิดเผยว่าคนอเมริกันคาดว่าคนอเมริกันจะเดิมพัน 2.72 พันล้านดอลลาร์ในการแข่งขันบาสเกตบอล NCAA ในปีนี้ โดยเน้นถึงความจำเป็นในการเตรียมการเด็กนักเรียนนักกีฬาด้วยความทราบและเครื่องมือในการนำทางภูมิทัศน์นี้อย่างมีความรับผิดถูกใจ
หุ้นของ Bally’s Corp. ซื้อขายในวันนี้สูงถึง 14.67 ดอลลาร์ก่อนที่จะลดลงข่าวดังกล่าวมาเมื่อคณะกรรมการบริษัทตกลงที่จะประเมินข้อเสนอซื้อจากประธานบริษัท Soo Kim และกองทุนป้องกันความเสี่ยง Standard General ของเขา
ข้อเสนอของ Standard General ให้ความสำคัญกับหุ้นของ Bally ที่ 15 ดอลลาร์ต่อหุ้น แต่ยังเปิดประตูให้ “ทางเลือกเชิงกลยุทธ์ที่เป็นไปได้สำหรับข้อเสนอ”Bally’s ได้ประกาศว่าจะตั้งขึ้นคณะกรรมการพิเศษที่ประกอบด้วย “กรรมการอิสระและไม่สนใจ” เพื่อพิจารณาข้อเสนอ
สมาชิกคณะกรรมการ ได้แก่ ซีอีโอ โรเบสัน รีฟส์ และประธานาธิบดี George Papanier รวมถึงกรรมการอิสระจำนวนหนึ่งไม่มีระบุไทม์ไลน์เพื่อพิจารณาจากคณะกรรมการพิเศษ
Standard General ก่อตั้งขึ้นโดยคิมในปี 2007 เชี่ยวชาญด้านการลงทุนในหนี้สินที่มีปัญหาหนี้สินกองทุนป้องกันความเสี่ยง
ได้รับเครดิตในการจัดการการล้มละลายของ Aliante Hotel & Casino ในลาสเวกัสและ Greektown Casino ในดีทรอยต์ ซึ่งเดี๋ยวนี้เป็นเจ้าของโดย Penn Entertainment และเปลี่ยนแบรนด์ฮอลลีวูดที่ Greektownสแตนดาร์ดเจเนอรัลยังเกี่ยวข้องกับการล้มละลายของ Radio Shack และ American Apparel
Standard General ร่วมมือกับ Apollo Global Management (ซึ่งดำเนินงานของ Venetian และ Palazzo ในลาสเวกัส) เพื่อนำTegna Inc. เป็นส่วนตัวในเดือนกุมภาพันธ์ 2022การขายจะทำให้มีการขายสถานีโทรทัศน์จำนวนหนึ่งที่เป็นของ Standard Generalข้อตกลงถูกยกเลิกในเดือนพฤษภาคม 2023
Igaming และ Catena Media บริษัท การตลาดการพนันกีฬาได้เลือก Manuel Stan เป็นประธานเจ้าหน้าที่บริหาร ไม่นานหลังจากอดีตซีอีโอไมเคิล ดาลี่ออกจากตำแหน่งซึ่งลาออกท่ามกลางผลการดำเนินงานในไตรมาสที่สี่ที่น่าผิดหวัง
Stan มีประสบการณ์เกือบจะสองทศวรรษในอุตสาหกรรมการพนันกีฬาออนไลน์และเกมคาสิโน
ที่ผ่านมาเคยดำรงตำแหน่งประธานที่ Unibet Interactiveนอกเหนือจากนี้เขายังทำงานกับผู้ประกอบการ iGaming รายใหญ่ Kindred Group มานานกว่า 16 ปี ซึ่งเขาเป็นผู้นำทีมการตลาดและครองตำแหน่งรองประธานอาวุโสสำหรับอเมริกาเหนือเขาสำเร็จการศึกษาระดับปริญญาตรีสาขาธุรกิจระหว่างประเทศและเศรษฐวิทยาจากมหาวิทยาลัยเศรษฐวิทยาบูคาเรสต์ และประกาศนียบัตรหลักสูตรการจัดการผู้บริหารจาก Yale School of Manการบริหารจัดการ
“มานูเอลเป็นผู้สมัครที่โดดเด่นสำหรับตำแหน่งนี้ในบรรดาชื่อที่พิจารณา และพวกเรายินดีอย่างยิ่งที่เขาเข้าร่วมกับเราเขาเป็นผู้นำที่มีทักษะความเป็นผู้นำที่พิสูจน์แล้วและประสบการณ์ที่กว้างขวางในอุตสาหกรรมของพวกเรา” Göran Blomberg ประธานของ Catena Media กล่าว“ความทราบอย่างใกล้ชิดของเขาเกี่ยวกับตลาดอเมริกาเหนือและทั้งผู้ประกอบการและฝ่ายพันธมิตรของธุรกิจจะเป็นสินทรัพย์สำคัญสำหรับ Catena Media และองค์กรที่มุ่งเน้นไปที่อเมริกาเหนือของเราเมื่อเราเริ่มฉาใหม่นี้ปเตอร์สำหรับกลุ่ม”
Stan จะเริ่มในวันที่ 1 กรกฎาคม รับผิดถูกใจในการเป็นผู้นำการดำเนินงานในตลาดอเมริกาเหนือและทั่วโลกของบริษัทจากสำนักงานลาสเวกัส
“ฉันยินดีที่ได้มีโอกาสนี้ในการขับขี่ Catena Media ไปข้างหน้าในขั้นตอนต่อไปของการเดินทางในขณะที่กลุ่มนี้จัดการกับความท้าทายใหม่ในขณะที่ก้าวไปสู่การแสดงตัวในอเมริกาเหนือนี่เป็นธุรกิจที่แข็งแกร่งที่มีพนักงานที่มีความสามารถ และฉันหวังว่าจะทำงานร่วมกับทีมเพื่อใช้ประโยชน์จากโอกาสที่กำลังอยู่ข้างหน้าอย่างเต็มที่” เขากล่าว
ไซต์ Tropicana ขนาด 35 เอเคอร์เป็นเจ้าของโดย Gaming and Leisure Properties ซึ่งให้เช่าให้กับ Bally’s ในราคา 10.5 ล้านดอลลาร์ต่อปีGLPI กำลังมอบพื้นที่เก้าเอเคอร์ของ A สำหรับสวนบอลซึ่งมีกำหนดจะเริ่มก่อสร้างในปี 2025
A ยังไม่ได้เปิดตัวการแสดงผลของสนามกีฬาที่เสนอ พวกเขาสามารถเปิดตัวได้ในช่วงสุดสัปดาห์นี้ เมื่อทีมอยู่ในเมืองสำหรับเกมฝึกฤดูใบไม้ผลิสองเกมที่ Las Vegas Ballpark ในซัมเมอร์ลิน
รัฐเนวาดาได้เงินทุนมากถึง 380 ล้านดอลลาร์จากค่าใช้จ่ายของสนามกีฬาในขณะที่ A มีหน้าที่รับผิดถูกใจประมาณ 1 พันล้านดอลลาร์GLPI ตกลงที่จะระดมทุนมากถึง 175 ล้านดอลลาร์เพื่อการปรับปรุงแก้ไขด้วยกันบางอย่างในการพัฒนาในอนาคตเพื่อแลกเปลี่ยนกับการเพิ่มค่าเช่าที่สม่ำเสมอ
ในขณะที่เจ้าหน้าที่ของรัฐและผู้บริหารการท่องเที่ยวยังคงมองโลกในแง่ดีว่าโครงการนี้จะเกิดผล แต่ก็มีความสงสัยจากสาธารณะและสื่อระดับชาติว่าพื้นที่เก้าเอเคอร์มีขนาดใหญ่พอหรือไม่และการเป็นเจ้าของของ A สามารถรับเงินทุนสำหรับโครงการได้หรือไม่
Brendan Bussmann ที่ขอคำแนะนำคาสิโน พันธมิตรผู้จัดการของ B Global ที่ติดตามการประชุมคณะกรรมการควบคุมการเล่นเกมกล่าวว่าอนาคตของสนามกีฬาและการสร้างใหม่ Tropicana เป็นปัญหาที่ถูกต้องและแน่นอนว่าจะได้รับการแก้ไขในเดือนนี้เรื่องนี้จะดำเนินการเฉพาะหน้าคณะกรรมาธิการเล่นเกมเนวาดา 21 มีนาคม
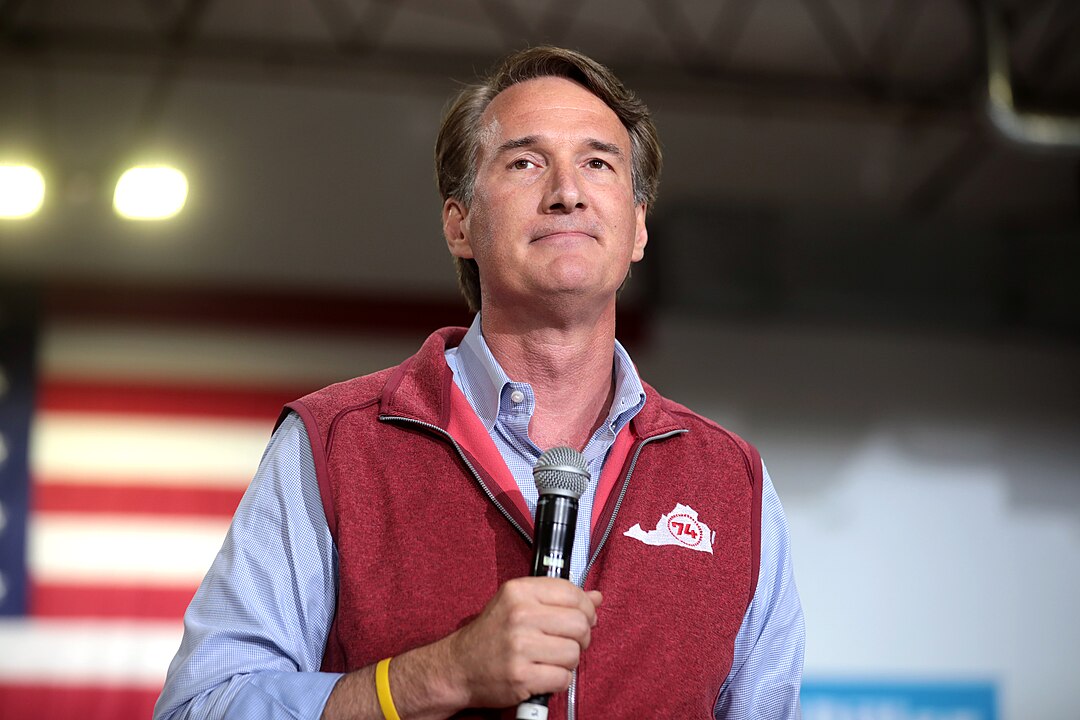
“เป็นเวลาหลายปีที่ธุรกิจขนาดเล็กหลายพันแห่งทั่วเครือจักรภพได้พึ่งรายได้เสริมและยั่งยืนที่ให้โดยเกมความสามารถชัยชนะนี้จะเสริมสร้างการเผยตัวของพวกเขาในเวอร์จิเนียและทำให้ผู้ครอบครองธุรกิจขนาดเล็กหลายพันคนรู้สึกสบายใจเมื่อทราบดีว่าพวกเขาสามารถเปิดประตูของพวกเขาสร้างงานและสนับสนุนชุมชนท้องถิ่นได้” Rich Kelly ร้านอาหารและประธานของ Virginia Merchants and Amusement Coalition ซึ่งก่อตั้งขึ้นเพื่อสนับสนุนการทำให้ถูกกฎหมายของ T กล่าวเขาเป็นเครื่องจักร
หลังจากตรวจเจอความพยายามที่ไม่ระบุตัวตนในการเข้าถึงเครือข่ายคอมพิวเตอร์ของตน Casino Del Sol รายงานเหตุการณ์บนเว็บไซต์และหยุดบริการรวมทั้งเครดิตคาสิโนและบิงโกกรงเงินสดและบริการเอทีเอ็ม ตู้ส่งเสริมการขายและ Club Sol ในเหตุการณ์อื่นที่เปลี่ยนจุดสนใจไปที่ความกังวลอย่างสม่ำเสมอเกี่ยวกับภัยคุกคามด้านความปลอดภัยทางไซเบอร์ต่ออุตสาหกรรมคาสิโน
Sports Bar & Fanatics Sportsbook ที่ XL Center ของ Hartford ซึ่งเป็นการลงทุนมูลค่า 5 ล้านดอลลาร์ที่เปิดด้วยความคาดหวังสูงในเดือนกันยายนคาดการณ์ว่าอาจขาดทุน 500,000 ดอลลาร์สำหรับปีงบประมาณสิ้นสุดวันที่ 30 มิถุนายน ซึ่งเป็นตัวเลขที่แสดงถึงการปรับแก้จากการคาดการณ์ขาดทุน 750,000 ดอลลาร์ ตามข้อมูลของ Capital Region Development Authority ซึ่งจัดการ XL Center
“พวกเราเปิดตัวมันกับ Rush Street เนื่องจากพร้อมใช้งาน มันเป็นโครงการขนาดใหญ่มาก” Andrew Walter ผู้อำนวยการฝ่ายกฎหมายและธุรกิจของแผนกเดิมพันกีฬาของ The Connecticut Lottery Corp อธิบายกับ Hartford Courant “Rush Street กำลังออกไปสองสามเดือนต่อมา โดยเหตุนี้ (Sportbook) จึงไม่ได้รับความบันเทิงหรือความสนใจจากด้านการตลาดที่อาจจะได้รับ”
ผู้บริหารอาวุโสสำหรับกิจกรรมการเดิมพันและการเล่นเกมของบราซิลจะจัดประชุมคณะกรรมการจัดการประชุมบ่อยที่เกี่ยวข้องกับหัวข้อนี้ โดยมีกลุ่มผู้เชี่ยวชาญที่มีส่วนร่วมกับความเชี่ยวชาญและความเป็นผู้นำให้กับอุตสาหกรรมกีฬาชื่อที่โดดเด่น ได้แก่ Pedro Melo (ประธานเจ้าหน้าที่พาณิชย์ Clube Atlético Mineiro); Ricardo Padoveze (หัวหน้าสปอนเซอร์คลับเดอเรกาตัสโด ฟลาเมงโก); อาร์นาลโด การ์เซีย (CRO — ผู้อำนวยการฝ่ายการตลาดและเนโกซิอส, Coritiba Foot Ball Club SAF); ราฟาเอล กาเนม (Commผู้อำนวยการฝ่ายจัดการ SAF Botafogo); Paula Young (หัวหน้าฝ่ายกิจกรรมเชิงพาณิชย์และความชมรมระหว่างประเทศ SAF Botafogo); Liana Bazanela (ผู้อำนวยการฝ่ายการตลาดและข้อตกลง, Sport Club Internacional); และ Roberto Armelin (Director Legal e de Compliance, São Paulo F.C.)
ภายในการอภิปรายที่ SBC Summit Rio วาระการประชุมจะนำเสนอเซสชันไตรภาคความซื่อตรงเซสชันเริ่มต้นจะซูมเข้าสู่แนวทางที่ใช้ SAF Botafogo และการปฏิบัติตามกฎเกณฑ์ ทำให้มั่นใจได้ว่าการป้องกันที่ดีขึ้นสำหรับทั้งผู้เล่นและผู้ประกอบการข้อที่สองจะสำรวจการรวมกรอบความหลากหลาย ความเท่าเทียมกัน และการรวมเข้ากับหลักการหลักของทีมฟุตบอลข้อที่สามจะกล่าวถึงความก้าวหน้าทางเทคโนโลยีสามารถช่วยทีมในการต่อสู้กับคอร์ที่เกี่ยวข้องกับการเดิมพันได้อย่างไรโครงการเริ่มการทุจริตและการทำงานร่วมกันเพื่อจัดการกับการแก้ไขการจับคู่ซึ่งเป็นความกังวลที่สำคัญในตลาดบราซิล
เซสชัน “Crafting the Perfect Partnership: Success Stories in Sports” จะให้ข้อมูลเชิงลึกเกี่ยวกับเหตุใดความร่วมมือระดับที่ถือว่าสูงจึงเป็นเครื่องมือสำคัญสำหรับผู้ประกอบการในตลาดที่พึ่งจะเปิดตัว และวิธีที่ข้อตกลงดังกล่าวสามารถใช้ประโยชน์เพื่อเพิ่มความตระหนักถึงแบรนด์ในบราซิลได้อย่างไรคณะกรรมการจะได้รับการเสริมด้วยข้อมูลเชิงลึกจากผู้ประกอบการ โดยบรูโน กิลเฮอร์เม่ (CEO, Viradabet) และ Renan Cavalcanti (CMO/CXO, EstrelaBet) เข้าร่วมแถวผู้พูดพร้อมกับริคาร์โด ปาโดเวซ (หัวหน้าฝ่ายสนับสนุนของ Clube) de Regatas do Flamengo), Guilherme Guimarães (พันธมิตรผู้ก่อตั้ง Ativa Esporte) และ Murilo Limo (ผู้อำนวยการหุ้นส่วนของ LATAM OneFootball) และผู้ดูแลแผง Fellipe Drommond (CEO, TFW Marketing e Comunicação)
สุดท้าย งานนี้จะจัดบันทึกสดของ “Behind the Badge” พอดคาสต์ SBC ที่เน้นโลกแห่งกีฬาห่างจากแอ็คชั่นสดที่จัดโดย George Harborne ผู้อำนวยการสปอนเซอร์ของ SBC และเฟอร์นันโด มอลลินส์ นักข่าวธุรกิจ SBC Media LATAMArnaldo Garcia (CRO — ผู้อำนวยการฝ่ายการตลาดและการเจรจาต่อรอง Coritiba Foot Ball Club SAF) จะอยู่ในที่นั่งแขกในขณะที่สามคนสำรวจด้านการค้าของอุตสาหกรรมกีฬา
ฤดูใบไม้ผลิและฤดูร้อนที่ผ่านมา นักต้มตุ๋นในเนวาดาและทั่วประเทศโน้มน้าวให้ผู้รับเงินสดของคาสิโนมอบเงินสดหลายแสนดอลลาร์ในกรณีของ Circa Las Vegas นักต้มตุ๋นตัวเป็นเจ้าของร่วมคาสิโน โทรหากรงและขอเงินสดจากหัวหน้างานซึ่งนำไปสู่การโจรกรรมจำนวน 1 ล้านเหรียญต่อมาได้มีการจับกุมในคดีดังกล่าว
“AI มีความก้าวหน้าอย่างมากและรวดเร็วมากจนเรากำลังเห็นสิ่งนี้ด้วยของปลอมลึก เช่น สิ่งที่เกิดขึ้นกับวิดีโอ Taylor Swift (เปลือย) และด้วยเสียงพวกเขาสามารถโคลนเสียงของใครบางคนด้วยเสียงเพียงสามวินาทีพวกเขาสามารถสร้างคู่ของ AI ที่น่าเชื่อถือได้มากเรากำลังเห็น AI ใช้เป็นแพลตฟอร์มการโจมตีเป็นอย่างมากเป็นช่วงเวลาที่น่ากลัวสำหรับทุกธุรกิจ แต่ใครก็ตามที่มีเงินจำนวนมากด้วยนับล้านและพันล้านดอลลาร์ เครือข่ายเหล่านี้กำลังกำหนดเป้าหมายคุณ”
นอกเหนือจากนี้ Team Vitality ยังเข้าร่วมใน Match of LegGends ของ GG.BET ซึ่งเป็นกิจกรรมที่น่าตื่นตาตื่นใจในระหว่างที่พวกเขาปะทะกับ NAVI ซึ่งเป็นสโมสรอีสปอร์ตมืออาชีพอีกสโมสรหนึ่งการแข่งขันนี้ได้มองเห็นโดยแฟนมากกว่าล้านคนทั้งโลก
ไวทัลลิตี้ ซึ่งเดี๋ยวนี้ถือเป็นทีม CS ชั้นนำของโลก ได้รับรางวัลใหญ่ครั้งแรกที่ BLAST Paris Major 2023